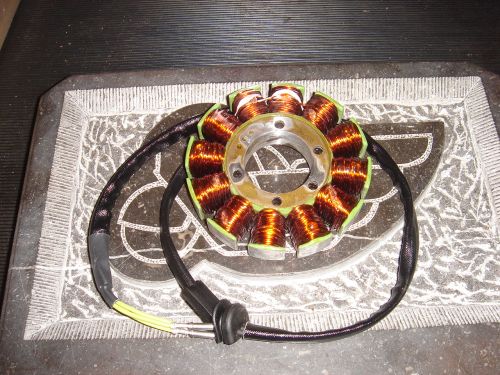
New Buell 1125R and 1125CR 2009-2010 stator. This stator is wound with 240 degrees C wire (vs. 200 degrees C stock) and ready to mount.
**Before installing this rebuilt stator be sure to get the upgraded version from us The TM developed rotor, otherwise stators will continue to burn and will not be covered under warranty.
replacement for OEM Y0442.2AM
Also highly recommanded to buy ;
Rotor with oil jet modification
Timing cover Gasket R0008.1AM
New Rotor Nut CD0032.1AMA
Crank shaft locking tool
Loctite 272
Plug and play Mosfet regulator
not always needed, but advised for original exhaust
Exhaust gaskets 2x
Here is the movie how to remove your damaged stator
And here is the movie how to use our cranck locking tool
and here you can buy our cranck locking tool
We highly recommand to use high them silicon gasket to keep the stator wire in place. look HERE
Installation 1125 Rotor / Nut ( update tightening procedure )
Note Crank Locking tool is already in position
1. Match the double tooth spline on the crankshaft with the gap in splines.
in the rotor hub and slide the flywheel hub onto the crankshaft
2. Press the flywheel onto the starter gear.
3. Rotate the starter gear and the freewheeling gear until the teeth mesh
4. Clean the threads of the crankshaft and crankshaft nut ( ALWAYS USE A NEW NUT ) with brake cleaner
Note Where LOCTIDE 272 ( red ) is unavailable , Use LOCTIDE 278 ( red )
5. Install the flywheel nut
a. Apply LOCTITE 272 ( red ) to the threads and the mating face off the crankshaft nut.
b. Tighten to 285 NM ( 210 ft-lbs )
c. Back off the nut counter clockwise approximately 720 degrees
d. Tighten to 285 NM ( 210 ft- lbs )
e. Back off the nut counter clockwise approximately 720 degrees
f. Final tighten to 400 NM ( 295 ft-lbs )
6. Remove the crank shoaft locking tool
7. Install the plug and tighten to 15 Nm ( 11 ft-lbs )
Buell Parts
Buell onderdelen
pièces buell
أجزاء بويل
Buell teile
ビューエルパーツ
Partes buell
Buell части
|